S小魚仔S 網誌搜尋

2020年3月1日 星期日

S小魚仔S VMware Vsphere 6.7 U3b 搭建 vSphere Integrated Containers

實驗環境
Vsphere Esxi: 6.7U3b 僅支持「vSphere Enterprise Plus license」授權。
Vsphere V-Center: 6.7U3b。
vSphere Integrated Containers: vic-v1.5.4.ova。
PS. Vsphere Esxi 需要搭建一組「分布式交換機」( vSphere Distributed Switch )

簡易架構拓譜圖


1. 建立「分佈式交換機」 ( VDS ) 

本次實驗建立「分佈式交換機」不綁定任何「Esxi」網卡,目的只是為了讓「VCH」Bridage Network 掛載使用,基本上全部採預設「下一步」即可


創建完成「分佈式交換機」接著添加「Vshpere Esxi」主機加入「DSwitch


注意這裡不加入任何「實體網卡」,依照您個人環境決定


注意這裡選擇不加入「VMkernel 介面卡

這裡可以選擇那些「Guest VM」網卡 需要移轉到「分佈式交換機」( VDS )


完成以後在「DSwitch」點選「主機」就可以看到「Vsphere Esxi」加入管理

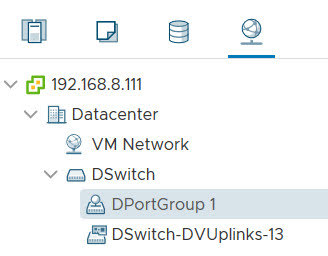
接著重新命名「DportGroup」改為「DportGroup 1」方便好記


2. 配置 Vsphere Esxi「允許」vic engine 2377 (TCP) 防火牆


3. 匯入「vic-v1.5.4-7589-e70af4fe.ova」模板


這邊需要配置 VIC Root「密碼」這個密碼「很重要」後面佈署「VCH」會用到

這邊配置 「靜態」IP 位址,其餘採用「預設值」即可

確認「配置清單

匯入「完成」登入「vSphere Integrated Containers」網址 ( https://192.168.8.113:9443/ )


 接著這裡會匯入「VIC」Plugin 到「V-C」Web Client

1. 輸入「V-C」帳號、密碼
2. 輸入「VIC」密碼

看到這一串「英文」( Installation successful. Refer to the Post-install and Deployment tasks below. All vSphere Client users must log out and log back in again twice to see the vSphere Integrated Containers plug-in. ) 表示佈署「VCH」成功


重新登入「V-C」Web Client 就會跳出「VIC」Plug-in 安裝完畢,重新整理瀏覽器


看到「VIC」圖示出現後,接著還需要配置

4. 接著配置「VCH


通用配置「VCH」名稱、容器範本「名稱


1. 可以指定整個「DataStore」為「映像庫
2. 指定「DataStore」創建「Volume datastore」為「映像庫
PS. 兩者都可以。


這裡就最重要步驟配置「VCH」網路「Birdage Network」需要配置「分佈式交換機」( VDS ) 可以想成是「LAN」端口,「Public Netowrk」就是對外「通訊」可以想成是「WAN」端口
  
這裡啟用「DOCKER API」安全配置,測試環境就關了吧

這裡我不是很懂做什麼用途..關了吧

這裡配置「VCH」管理者「帳號」、「密碼
PS. 1. 帳戶必須提前創建,而且不允许具有administrator权限,使用「ad」或「vshpere.local」的帳戶都可以。  
2. 後續所有docker container都是由這個用戶創建和管理的。

確認「配置」清單,沒問題就「佈署」下去

佈署「VCH」成功

登入「VCH」Admin Portal ( https://IP:2378/ ) 檢查狀態,發現「Sataus」顯示「Registry and Internet Connectivity」,「VCH」會透過「Internet」前往「https://docker.io/」更新「Docker」源資料庫。


等待「2~3」分鐘,重新登入「VCH」Admin Portal ( https://IP:2378/ )就會顯示「正常

接著登入「VIC」( https://IP:9443/ )

在「存放庫」找「Unifi AC Controller」看到很多「版本」適合就「佈建」下去...終於搞定了。

參考資料

2020年2月27日 星期四

S小魚仔S Ubuntu 18.04 安裝 Unifi Ac Controller ( 無線控制器 )

使用「Ubuntu」安裝「Unifi」無線控制器確實很複雜,安裝近10次都沒成功,後來找到「自動化腳本」該作者是 glennrietveld8 編寫完成。首先 Ubuntu 必須採用「root」登入操作,必須連上「Internet」因該腳本會下載安裝「mongodb」和「Oracle-java8」和「Unifi Ac Controller」。

1. 下載「unifi-5.12.35.sh」腳本

2. 如果您人剛好在「中國大陸」麻煩修改「來源庫」否則下載非常慢,甚至好幾個鐘頭。

cd /etc/apt/
cp sources.list sources.list.bak
true > sources.list

#編輯「sources.list」加入「中國大陸」來源庫
vi /etc/apt/sources.list 

deb http://mirrors.aliyun.com/ubuntu/ bionic main restricted universe multiverse
deb http://mirrors.aliyun.com/ubuntu/ bionic-security main restricted universe multiverse
deb http://mirrors.aliyun.com/ubuntu/ bionic-updates main restricted universe multiverse
deb http://mirrors.aliyun.com/ubuntu/ bionic-proposed main restricted universe multiverse
deb http://mirrors.aliyun.com/ubuntu/ bionic-backports main restricted universe multiverse
deb-src http://mirrors.aliyun.com/ubuntu/ bionic main restricted universe multiverse
deb-src http://mirrors.aliyun.com/ubuntu/ bionic-security main restricted universe multiverse
deb-src http://mirrors.aliyun.com/ubuntu/ bionic-updates main restricted universe multiverse
deb-src http://mirrors.aliyun.com/ubuntu/ bionic-proposed main restricted universe multiverse
deb-src http://mirrors.aliyun.com/ubuntu/ bionic-backports main restricted universe multiverse
deb https://mirrors.ustc.edu.cn/ubuntu/ bionic main restricted universe multiverse
deb-src https://mirrors.ustc.edu.cn/ubuntu/ bionic main restricted universe multiverse
deb https://mirrors.ustc.edu.cn/ubuntu/ bionic-updates main restricted universe multiverse
deb-src https://mirrors.ustc.edu.cn/ubuntu/ bionic-updates main restricted universe multiverse
deb https://mirrors.ustc.edu.cn/ubuntu/ bionic-backports main restricted universe multiverse
deb-src https://mirrors.ustc.edu.cn/ubuntu/ bionic-backports main restricted universe multiverse
deb https://mirrors.ustc.edu.cn/ubuntu/ bionic-security main restricted universe multiverse
deb-src https://mirrors.ustc.edu.cn/ubuntu/ bionic-security main restricted universe multiverse
deb https://mirrors.ustc.edu.cn/ubuntu/ bionic-proposed main restricted universe multiverse
deb-src https://mirrors.ustc.edu.cn/ubuntu/ bionic-proposed main restricted universe multiverse
deb http://mirrors.163.com/ubuntu/ bionic main restricted universe multiverse
deb http://mirrors.163.com/ubuntu/ bionic-security main restricted universe multiverse
deb http://mirrors.163.com/ubuntu/ bionic-updates main restricted universe multiverse
deb http://mirrors.163.com/ubuntu/ bionic-proposed main restricted universe multiverse
deb http://mirrors.163.com/ubuntu/ bionic-backports main restricted universe multiverse
deb-src http://mirrors.163.com/ubuntu/ bionic main restricted universe multiverse
deb-src http://mirrors.163.com/ubuntu/ bionic-security main restricted universe multiverse
deb-src http://mirrors.163.com/ubuntu/ bionic-updates main restricted universe multiverse
deb-src http://mirrors.163.com/ubuntu/ bionic-proposed main restricted universe multiverse
deb-src http://mirrors.163.com/ubuntu/ bionic-backports main restricted universe multiverse
deb https://mirrors.tuna.tsinghua.edu.cn/ubuntu/ bionic main restricted universe multiverse
deb-src https://mirrors.tuna.tsinghua.edu.cn/ubuntu/ bionic main restricted universe multiverse
deb https://mirrors.tuna.tsinghua.edu.cn/ubuntu/ bionic-updates main restricted universe multiverse
deb-src https://mirrors.tuna.tsinghua.edu.cn/ubuntu/ bionic-updates main restricted universe multiverse
deb https://mirrors.tuna.tsinghua.edu.cn/ubuntu/ bionic-backports main restricted universe multiverse
deb-src https://mirrors.tuna.tsinghua.edu.cn/ubuntu/ bionic-backports main restricted universe multiverse
deb https://mirrors.tuna.tsinghua.edu.cn/ubuntu/ bionic-security main restricted universe multiverse
deb-src https://mirrors.tuna.tsinghua.edu.cn/ubuntu/ bionic-security main restricted universe multiverse
deb https://mirrors.tuna.tsinghua.edu.cn/ubuntu/ bionic-proposed main restricted universe multiverse
deb-src https://mirrors.tuna.tsinghua.edu.cn/ubuntu/ bionic-proposed main restricted universe multiverse
deb https://mirrors.tuna.tsinghua.edu.cn/mongodb/apt/ubuntu trusty/mongodb-org/stable multiverse


#更新「來源」庫
apt-get install

#安裝「CA」憑證 
ca-certificates wget -y

3. 執行「Script」
bash unifi-5.12.35.sh


#如果您遇到下載更新「mongodb」非常慢,請跟著下面步驟處理


前往該連結「https://repo.mongodb.org/apt/ubuntu/dists/xenial/mongodb-org/3.4/multiverse/binary-amd64/」下載 ( mongodb-org-shell_3.4.24_amd64.deb、mongodb-org-server_3.4.24_amd64.deb、mongodb-org-mongos_3.4.24_amd64.deb、mongodb-org-tools_3.4.24_amd64.deb ) 版本必須一模一樣。


#接著手動安裝「mongodb」離線檔案「.deb
dpkg -i mongodb-org-shell_3.4.24_amd64.deb
dpkg -i mongodb-org-server_3.4.24_amd64.deb 
dpkg -i mongodb-org-mongos_3.4.24_amd64.deb
dpkg -i mongodb-org-tools_3.4.24_amd64.deb

#接著再次執行Script
bash unifi-5.12.35.sh

#接著我又遇問題到下載「unifi」主程序非常慢,請自行下載「https://dl.ui.com/unifi/5.12.35/unifi_sysvinit_all.deb」離線檔案,進行離線安裝
dpkg -i unifi_sysvinit_all.deb


#接著再次執行Script
bash unifi-5.12.35.sh

#這時候就會下載「unifi-update.sh」透過該腳本可以自動進行「備份」與「升級」Unifi 控制器

#看到該「畫面」就已經完成嚕

#檢查「通訊端口

#登入「Wifly」控制器「網址」 ( https://ip:8443/ ) 設定就可以嚕


參考資料
Glenn R.」-「glennr.nl/scripts
Community.ui.com」-「UniFi Installation Scripts