如何透過 Windows 安裝「Zabbix 3.2 Agents」進行「監控」,官方網站有提供「Zabbix Pre-Compiled Agents」。
1. 開放「Windows-Firewall」TCP-10050 和 UDP-10050
netsh advfirewall firewall add rule name=" Zabbix_Agent_TCP(10050) Port" protocol=TCP dir=in localport=10050 action=allow
netsh advfirewall firewall add rule name=" Zabbix_Agent_UDP(10050) Port" protocol=UDP dir=in localport=10050 action=allow
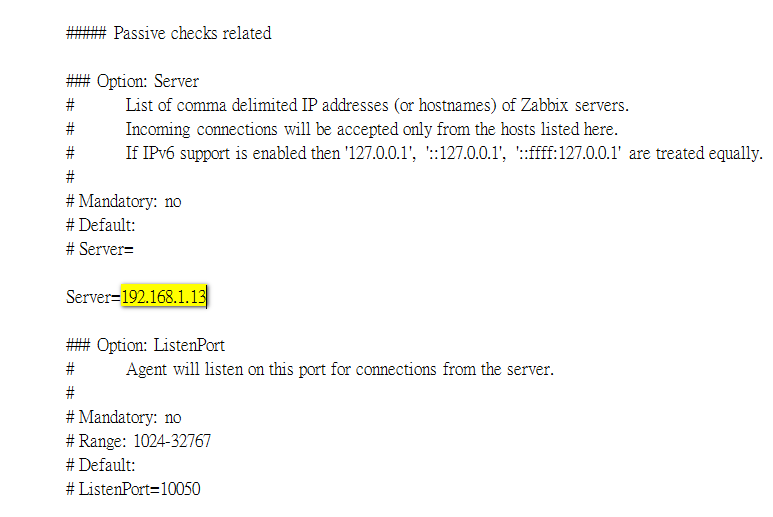
2. 修改「zabbix_agent_3.2.5_win.zip」附件 =>「conf/zabbix_agentd.win.conf」
Server=192.168.1.X

ServerActive=192.168.1.X
3. 執行「zabbix_agentd.exe」帶參數,呼叫「zabbix_agentd.win.conf」設定檔,加入「服務」
zabbix_agentd.exe --config C:\zabbix_agents_3.2.0.win\conf\zabbix_agentd.win.conf --install
4. 執行「zabbix_agentd.exe」帶參數,呼叫「zabbix_agentd.win.conf」開啟「服務」
PS.
千萬不要修改「啟動」路徑,否則會「啟動失敗」
zabbix_agentd.exe --config C:\zabbix_agents_3.2.0.win\conf\zabbix_agentd.win.conf --start
1. 點選「Configuration」
2. 點選「Hosts」
3. 點選「Create Host」
1. 點選「Host」
2.輸入「Host name」
3. 選擇「Groups」 (必要)
4. 輸入「Client」監控 IP 和 TCP Port
1. 點選「Templates」,選擇「監控」模組
2. 點選「Select」
選擇「Template OS Windows」
點選「Add」
回到「Host」選項 => 點選「Add」
完成「Windows」安裝「Agent」並「監控」
1. 開放「Windows-Firewall」TCP-10050 和 UDP-10050
netsh advfirewall firewall add rule name=" Zabbix_Agent_TCP(10050) Port" protocol=TCP dir=in localport=10050 action=allow
netsh advfirewall firewall add rule name=" Zabbix_Agent_UDP(10050) Port" protocol=UDP dir=in localport=10050 action=allow
2. 修改「zabbix_agent_3.2.5_win.zip」附件 =>「conf/zabbix_agentd.win.conf」
Server=192.168.1.X

ServerActive=192.168.1.X
3. 執行「zabbix_agentd.exe」帶參數,呼叫「zabbix_agentd.win.conf」設定檔,加入「服務」
zabbix_agentd.exe --config C:\zabbix_agents_3.2.0.win\conf\zabbix_agentd.win.conf --install
4. 執行「zabbix_agentd.exe」帶參數,呼叫「zabbix_agentd.win.conf」開啟「服務」
PS.
千萬不要修改「啟動」路徑,否則會「啟動失敗」
zabbix_agentd.exe --config C:\zabbix_agents_3.2.0.win\conf\zabbix_agentd.win.conf --start
5. 登入「Zabbix Server」 Web UI 監控「Windows」
1. 點選「Configuration」
2. 點選「Hosts」
3. 點選「Create Host」
1. 點選「Host」
2.輸入「Host name」
3. 選擇「Groups」 (必要)
4. 輸入「Client」監控 IP 和 TCP Port
1. 點選「Templates」,選擇「監控」模組
2. 點選「Select」
選擇「Template OS Windows」
點選「Add」
回到「Host」選項 => 點選「Add」
完成「Windows」安裝「Agent」並「監控」
參考資料


