2017年2月24日 星期五

S小魚仔S Zabbix 3.2 網路監控 安裝 SNMP 套件 (三)

為什麼需要使用「Zabbix」 進行「SNMP」監控,因為許多「網路設備 (防火牆、路由器..)」、「印表機設備」 、「儲存設備 ( NAS....)」並無法安裝「Zabbix Agent」但是都支持「SNMP」監控方式。

SNMP 可以監控那些?  處理器、硬碟、記憶體、端口流量..等

1. Zabbix Server 安裝「SNMP」Package
yum install net-snmp* -y

2. 編輯「snmp」配置「檔案

vi /etc/snmp/snmpd.conf


# First, map the community name "public" into a "security name"  ( 預設 廣播字串 public)
#       sec.name              source       community
com2sec notConfigUser  default       public


# Make at least  snmpwalk -v 1 localhost -c public system fast again.

#       name           incl/excl     subtree         mask(optional)

view    systemview    included   .1.3.6.1.2.1.1

view    systemview    included   .1.3.6.1.2.1.25.1.1

view   systemview   included  .1            (加入此行)


#  Make sure mountd is running
proc mountd

#  Make sure there are no more than 4 ntalkds running, but 0 is ok too.
proc ntalkd 4

#  Make sure at least one sendmail, but less than or equal to 10 are running.
proc sendmail 10 1

# Check the / partition and make sure it contains at least 10 megs.
disk / 10000

# Check for loads:
load 12 14 14

3. 啟動「snmpd」並 設定「snmpd」 開機自動執行
service snmpd start 
systemctl enable snmpd

4. 瀏覽「SNMP」服務,是否「開啟」 

netstat -auntp | grep snmp


5. 測試「SNMP」指令,能否獲取「SNMP」Client端 「Hostname」 
 snmpwalk -c public -v 2c 192.168.1.14 sysName


參考資料
維運生存時間」-「snmp安装配置 zabbix snmp监控准备(52)
51cto」-「Zabbix 之 SNMP方式监控
Rong-Shao」-「SNMP Introduction

2017年2月22日 星期三

S小魚仔S Windows 安裝 Zabbix 3.2 Agents (二)

如何透過 Windows 安裝「Zabbix 3.2 Agents」進行「監控」,官方網站有提供「Zabbix Pre-Compiled Agents」。

1. 開放「Windows-Firewall」TCP-10050 和 UDP-10050

netsh advfirewall firewall add rule name=" Zabbix_Agent_TCP(10050) Port" protocol=TCP dir=in localport=10050 action=allow

netsh advfirewall firewall add rule name=" Zabbix_Agent_UDP(10050) Port" protocol=UDP dir=in localport=10050 action=allow


2. 修改「zabbix_agent_3.2.5_win.zip」附件 =>「conf/zabbix_agentd.win.conf

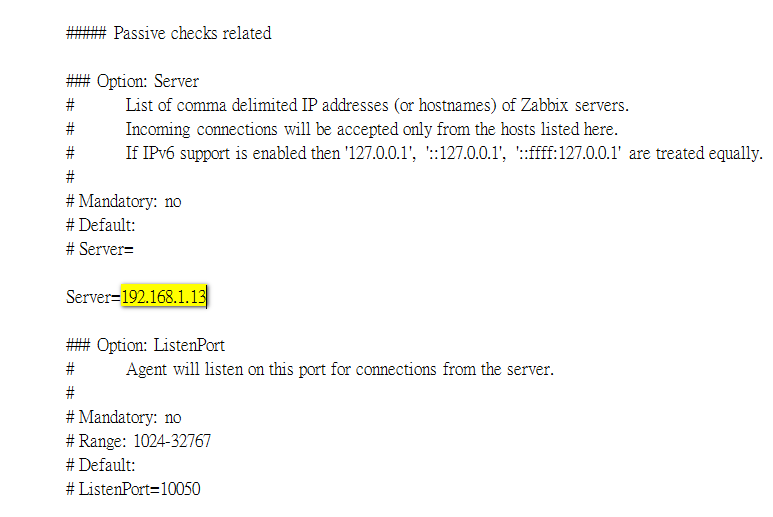
Server=192.168.1.X


ServerActive=192.168.1.X

3. 執行「zabbix_agentd.exe」帶參數,呼叫「zabbix_agentd.win.conf」設定檔,加入「服務

zabbix_agentd.exe --config C:\zabbix_agents_3.2.0.win\conf\zabbix_agentd.win.conf --install

4. 執行「zabbix_agentd.exe」帶參數,呼叫「zabbix_agentd.win.conf」開啟「服務」 
PS. 
千萬不要修改「啟動」路徑,否則會「啟動失敗 

zabbix_agentd.exe --config C:\zabbix_agents_3.2.0.win\conf\zabbix_agentd.win.conf --start


5. 登入「Zabbix Server」 Web UI 監控「Windows


1. 點選「Configuration」
2. 點選「Hosts
3. 點選「Create Host

1. 點選「Host
2.輸入「Host name
3. 選擇「Groups」 (必要)
4. 輸入「Client」監控 IP 和  TCP Port

1. 點選「Templates」,選擇「監控」模組
2. 點選「Select

選擇「Template OS Windows

點選「Add

回到「Host」選項 => 點選「Add

完成「Windows」安裝「Agent」並「監控

參考資料

2017年2月10日 星期五

S小魚仔S CentOS 7 Install Zabbix 3.2 網路監控、系統監控 簡易安裝 (一)

建置「Zabbix Server」需要知道幾樣關鍵,由於「Zabbix」 是基於「PHP」及「MySQL」 進行開發,需要搭建「LAMP」環境。

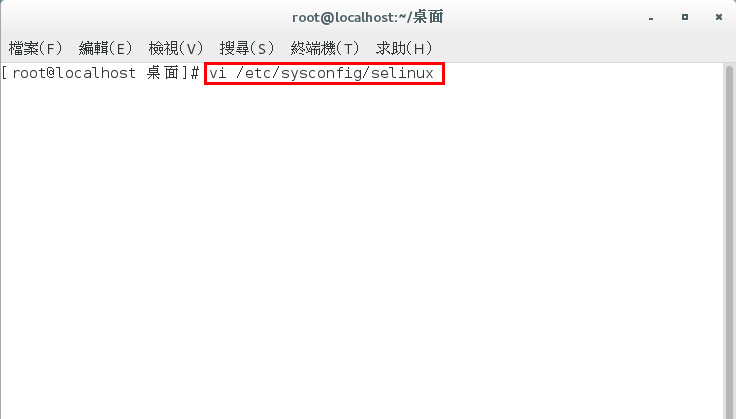
一. 關閉「selinux

vi /etc/sysconfig/selinux


selinux=disabled

reboot

二. 開放「Firewall

sudo firewall-cmd --add-port=80/tcp --permanent
sudo firewall-cmd --add-port=10051/tcp --permanent
sudo firewall-cmd --add-port=10051/udp --permanent
sudo firewall-cmd --reload

三. 「LAMP」( Apache+PHP+MySQL )

YUM」安裝 「Apache

yum install httpd

設定「啟動」httpd
systemctl start httpd

設定 開機自動啟動」httpd
systemctl enable httpd

YUM」安裝 「MySQL (MariaDB)

yum install mariadb-server mariadb

設定「啟動mariadb
systemctl start mariadb

設定 開機自動啟動mariadb
systemctl enable mariadb

YUM」安裝「PHP

yum install php php-mysql php-gd php-ldap php-odbc php-pear php-xml php-xmlrpc php-mbstring php-snmp php-soap curl curl-devel

重新啟動「httpd.service
systemctl restart httpd.service


四. 安裝「Zabbix 3.2 」 Server

RPM」安裝「Zabbix 3.2」Repository (版本庫)

rpm -ivh http://repo.zabbix.com/zabbix/3.2/rhel/7/x86_64/zabbix-release-3.2-1.el7.noarch.rpm


rpm -ivh http://repo.zabbix.com/zabbix/3.2/rhel/7/x86_64/zabbix-get-3.2.2-1.el7.x86_64.rpm


YUM」安裝「Zabbix」套件
PS.
安裝「Zabbix」相關套件: 「zabbix-server-mysql」、「zabbix-web-mysql」、「zabbix-agent」、「zabbix-java-gateway

yum install zabbix-server-mysql zabbix-web-mysql zabbix-agent zabbix-java-gateway

設定「啟動zabbix-server
sudo systemctl start zabbix-server

設定 開機自動啟動zabbix-server
sudo systemctl enable zabbix-server

五. 編輯「Zabbix」 的 「Apache」 設定檔「/etc/httpd/conf.d/zabbix.conf

vi /etc/httpd/conf.d/zabbix.conf

php_value date.timezone Asia/Taipei

重新啟動「httpd.service
service httpd restart

六. 編輯「zabbix_server.conf」修改「資料庫」、「帳號」、「密碼
PS. 
提前 編輯 「zabbix_server.conf」後續建立「MySQL」

vi /etc/zabbix/zabbix_server.conf

DBName=zabbix (預設)
DBUser=zabbix (預設)
DBPassword=123456 (修改)

重新「啟動zabbix-server
sudo systemctl restart zabbix-server

七. 建立 MySQL 建立 「Zabbix」帳號

mysql -u root -p
PS
root」沒「密碼」直接「Enter」。

create database zabbix character set utf8 collate utf8_bin;

GRANT ALL PRIVILEGES on zabbix.* to 'zabbix'@'localhost' IDENTIFIED BY '123456';

FLUSH PRIVILEGES;

quit;


八. 初始資料表匯入資料庫「Zabbix

zcat /usr/share/doc/zabbix-server-mysql-3.2.*/create.sql.gz | mysql -u zabbix -p zabbix


九. 重啟「Zabbix」相關「服務

systemctl restart mariadb

systemctl restart httpd.service 

sudo systemctl restart zabbix-server 

sudo systemctl restart zabbix-agent

十. 登入「Web UIhttp://localhost/zabbix

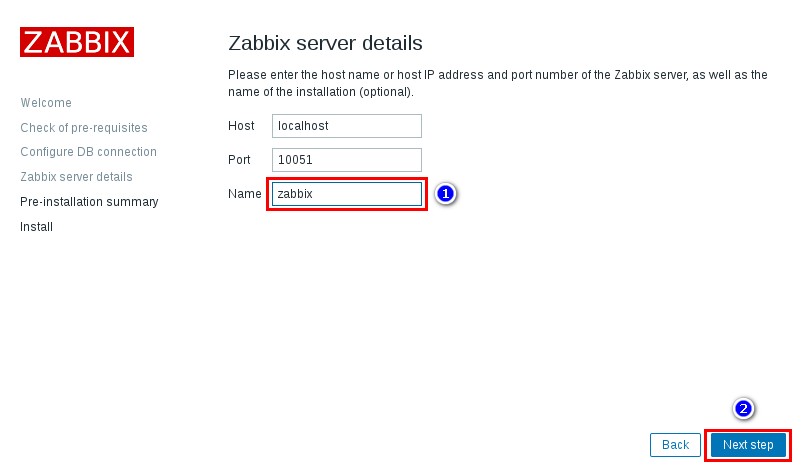
進行「導引安裝


輸入「MySQL」建立「Zabbix」密碼


帳號「Admin」、密碼「zabbix」(注意大小寫)


十一. 設定「Zabbix」繁體中文化

編輯「locales.inc.php
vi /usr/share/zabbix/include/locales.inc.php

編輯「zh_TW」為「true

'zh_TW' => ['name' => _('Chinese (zh_TW)'),     'display' => true],

修改「Zabbix Web UI」為「zh_TW」


參考資料
www.zabbix.com」-「Zabbix Download